John's Corner
LG TV Remote Control & WiFi issues
This tip covers how to fix issues with WiFi and the related effects on the magic remote for LG TVs.
The WebOS based LG TVs come with a magic remote that features an onscreen cursor, controlled simply by moving the remote control in space. This is a great and intuitive feature but many users are finding the remote becomes unresponsive over time, with the onscreen cursor disappearing along with an inability to change channels or adjust volume.
These issues can be fixed temporarily by turning off the TV and removing the power - either turn off at switch or remove cord - for 30 seconds or more. Generally, the remote will spring back to life, but the problems will recur sooner or later.
Related to this issue is the operation of the TV's WiFi. If you use a wired connection you may never see or check the WiFi, but if it is your primary connection, it will become very obvious as your TV reports it has lost the network connection. Even if you do use a wired connection, you may still see messages that the network has disconnected, followed soon after that the connection has been restored.
All of these issues are likely to symptomatic of the same core problem, that is, the disabled WiFi in the TV. You can check this by going to:
Settings > Advanced Settings > Network > WiFi
The TV will check the WiFi and attempt to connect but instead of displaying the available WiFi sources, it will display an error message something like:
"Wifi is turned off. Turn it on to see the list of available networks that you can connect to and additional related menu items."
Unfortunately, there is no physical button or menu setting to do this. The procedure below will provide access to the WiFi module inside the TV. Reseating the connector on the module is usually sufficent to restore operation of the TV WiFi and proper operation of the magic remote.
- First, prepare a flat surface like a large table that is big enough to hold the entire front surface of the TV.
- Get your tools ready: a medium sized Philips head screwdriver, some long tweezers or forceps if you have them, some blutack, a flat blade cutlery (rounded end) knife and a cleaning cloth.
- Turn off your TV at the wall switch and unplug the power cord.
- Note or tag the position of all the leads connected to your TV then unplug all leads starting with the power cord.
ATTENTION: Your TV is a delicate electronic device and must be handled carefully and safely. Get assistance to move it if necessary.
- Carefully place the TV face down on the flat surface you prepared, lining up the bottom of the TV with the edge of the surface and ensuring there is no overhang anywhere. Remove the legs or wall mounting bracket(s) as needed. Take the opportunity to remove any dust or dirt on the back cover of the TV using the clean dry cloth.
- Remove the back cover screws with reference to the picture below.
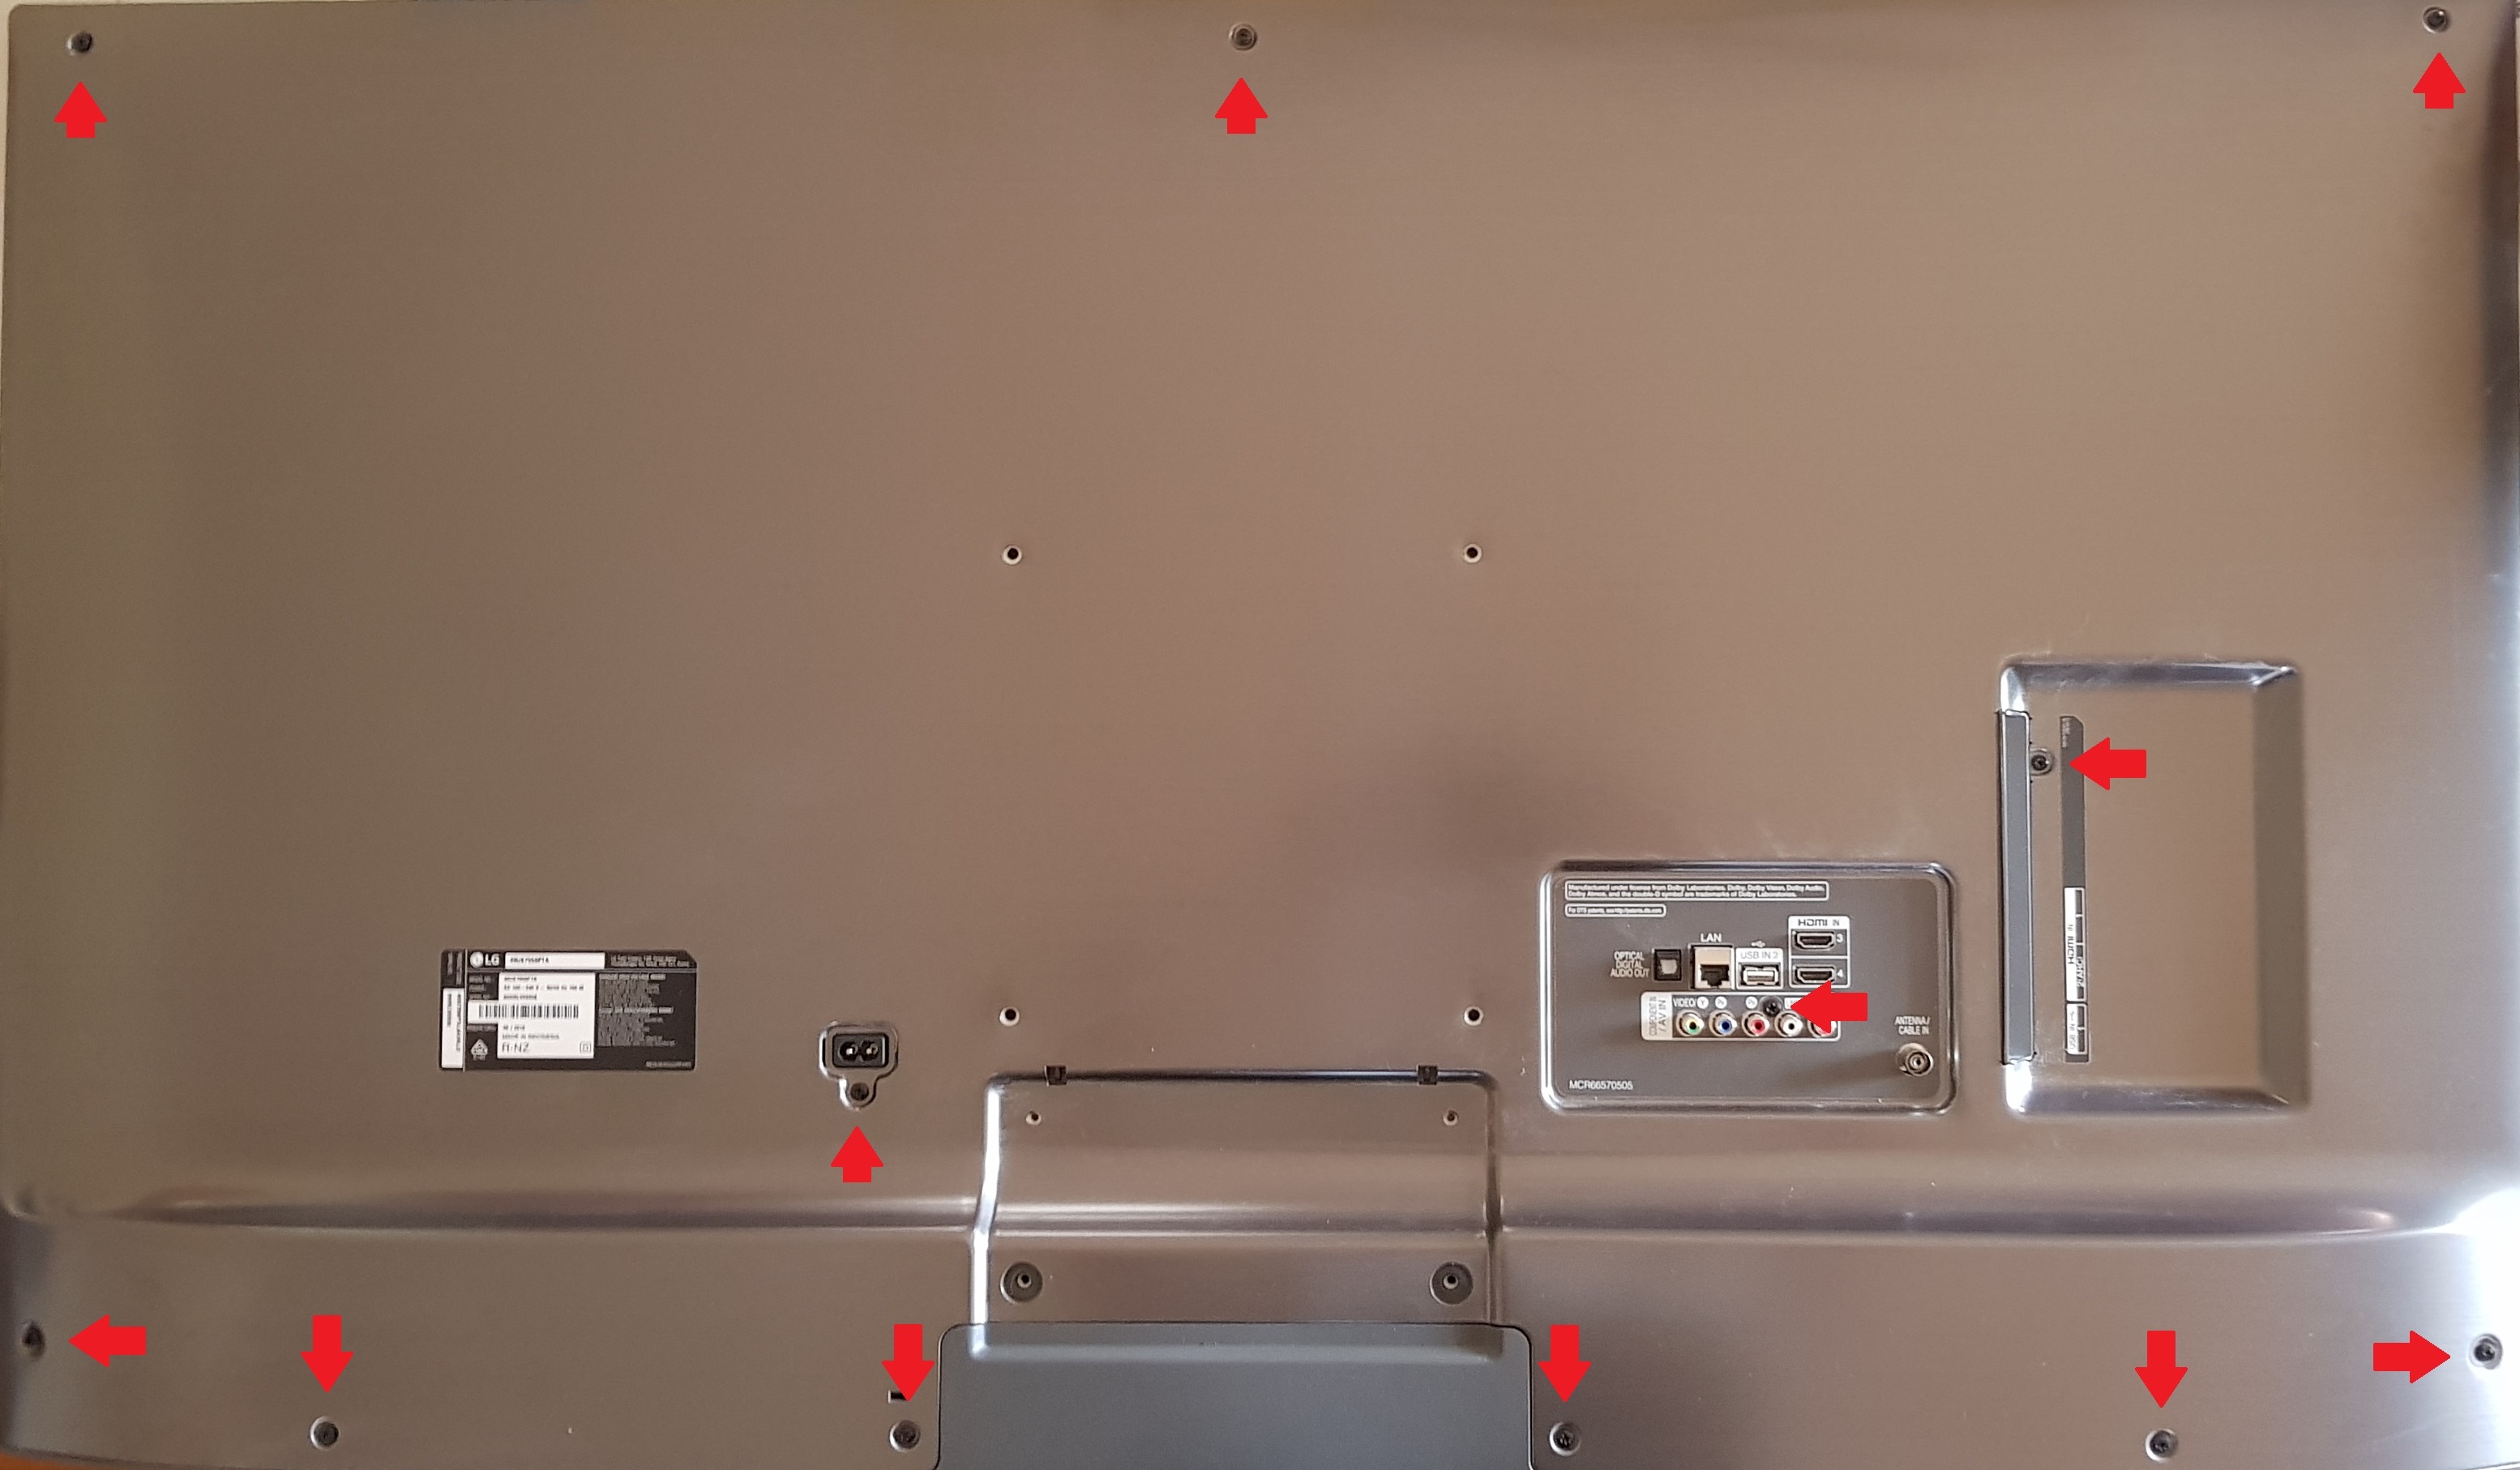 Make sure your screwdriver is a good fit into the head of the screws and limit downwards pressure as much as possible. The layout of the holes on your TV may be different - look for screws close to the power socket and the connector panels. There will likely be a combination of metal thread and self tapping screws. Use a small ball of blutack placed on the cover adjacent to the holes to mark the location of the self tapping screws.
- The cover is usually also secured by metal clips, so if the cover doesn't come away easily, carefully ease the cutlery knife under the cover no more than 10 mm starting at the bottom corners of the cover. Give the knife a twist to ease the cover off the metal clips. Be patient, working the knife up the sides until the cover snaps clear of each clip. There will probably be two clips down each side and four across the top. The top clips should come away once both sides are free. Carefully lift the cover off.
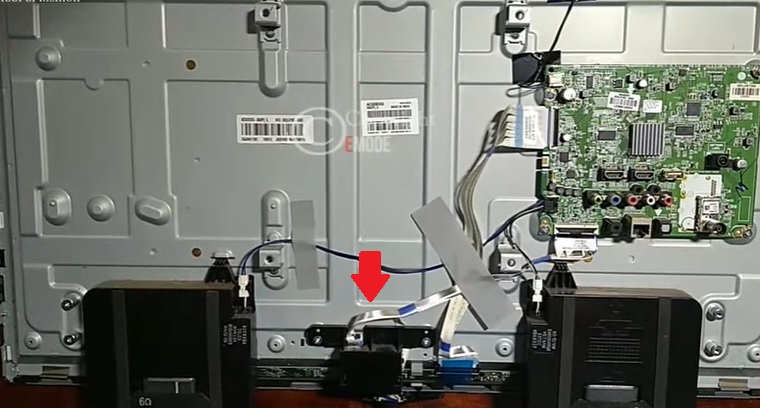
- Depending on the TV, the WiFi module may now be visible at the bottom center of the TV, as shown in the picture below.
 However, there may be a separate plastic shroud over the bottom of the TV holding the speakers as in the picture below.
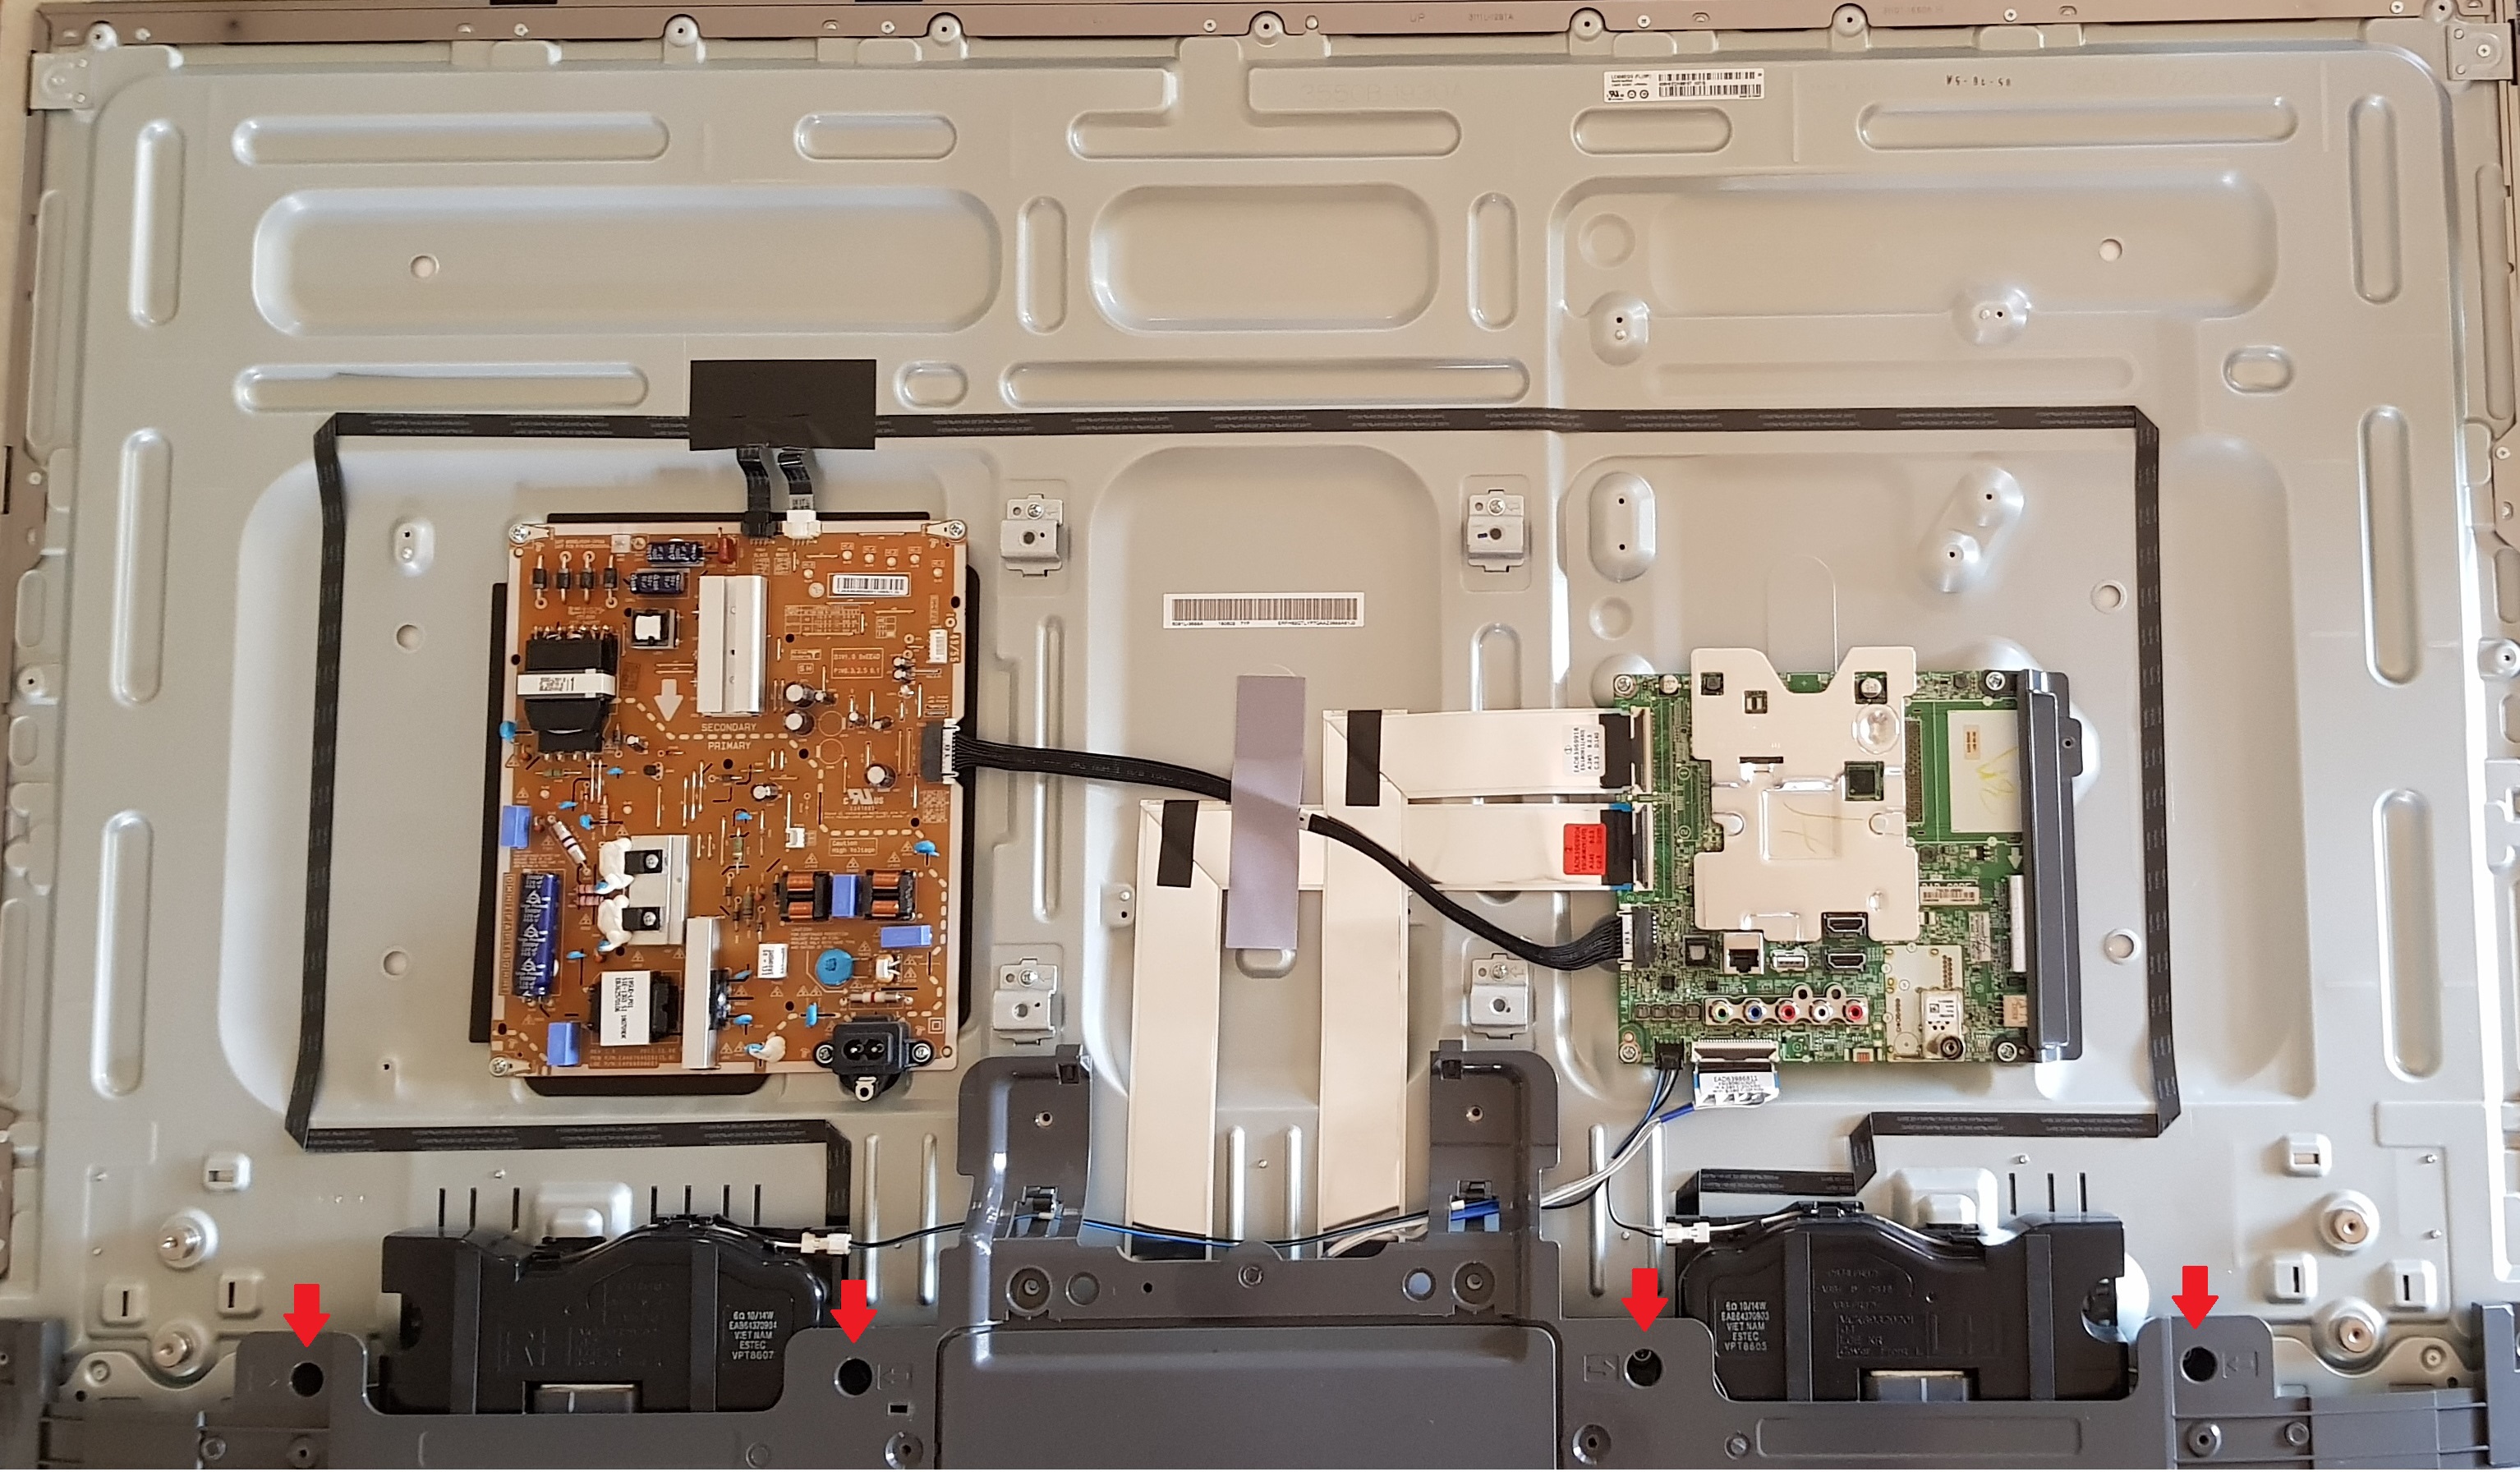 In this case, remove the four screws as shown, using tweezers or forceps to withdraw the screws from the bottom of the plastic sleeved holes. There are also screws on the bottom face of the shroud as shown below.

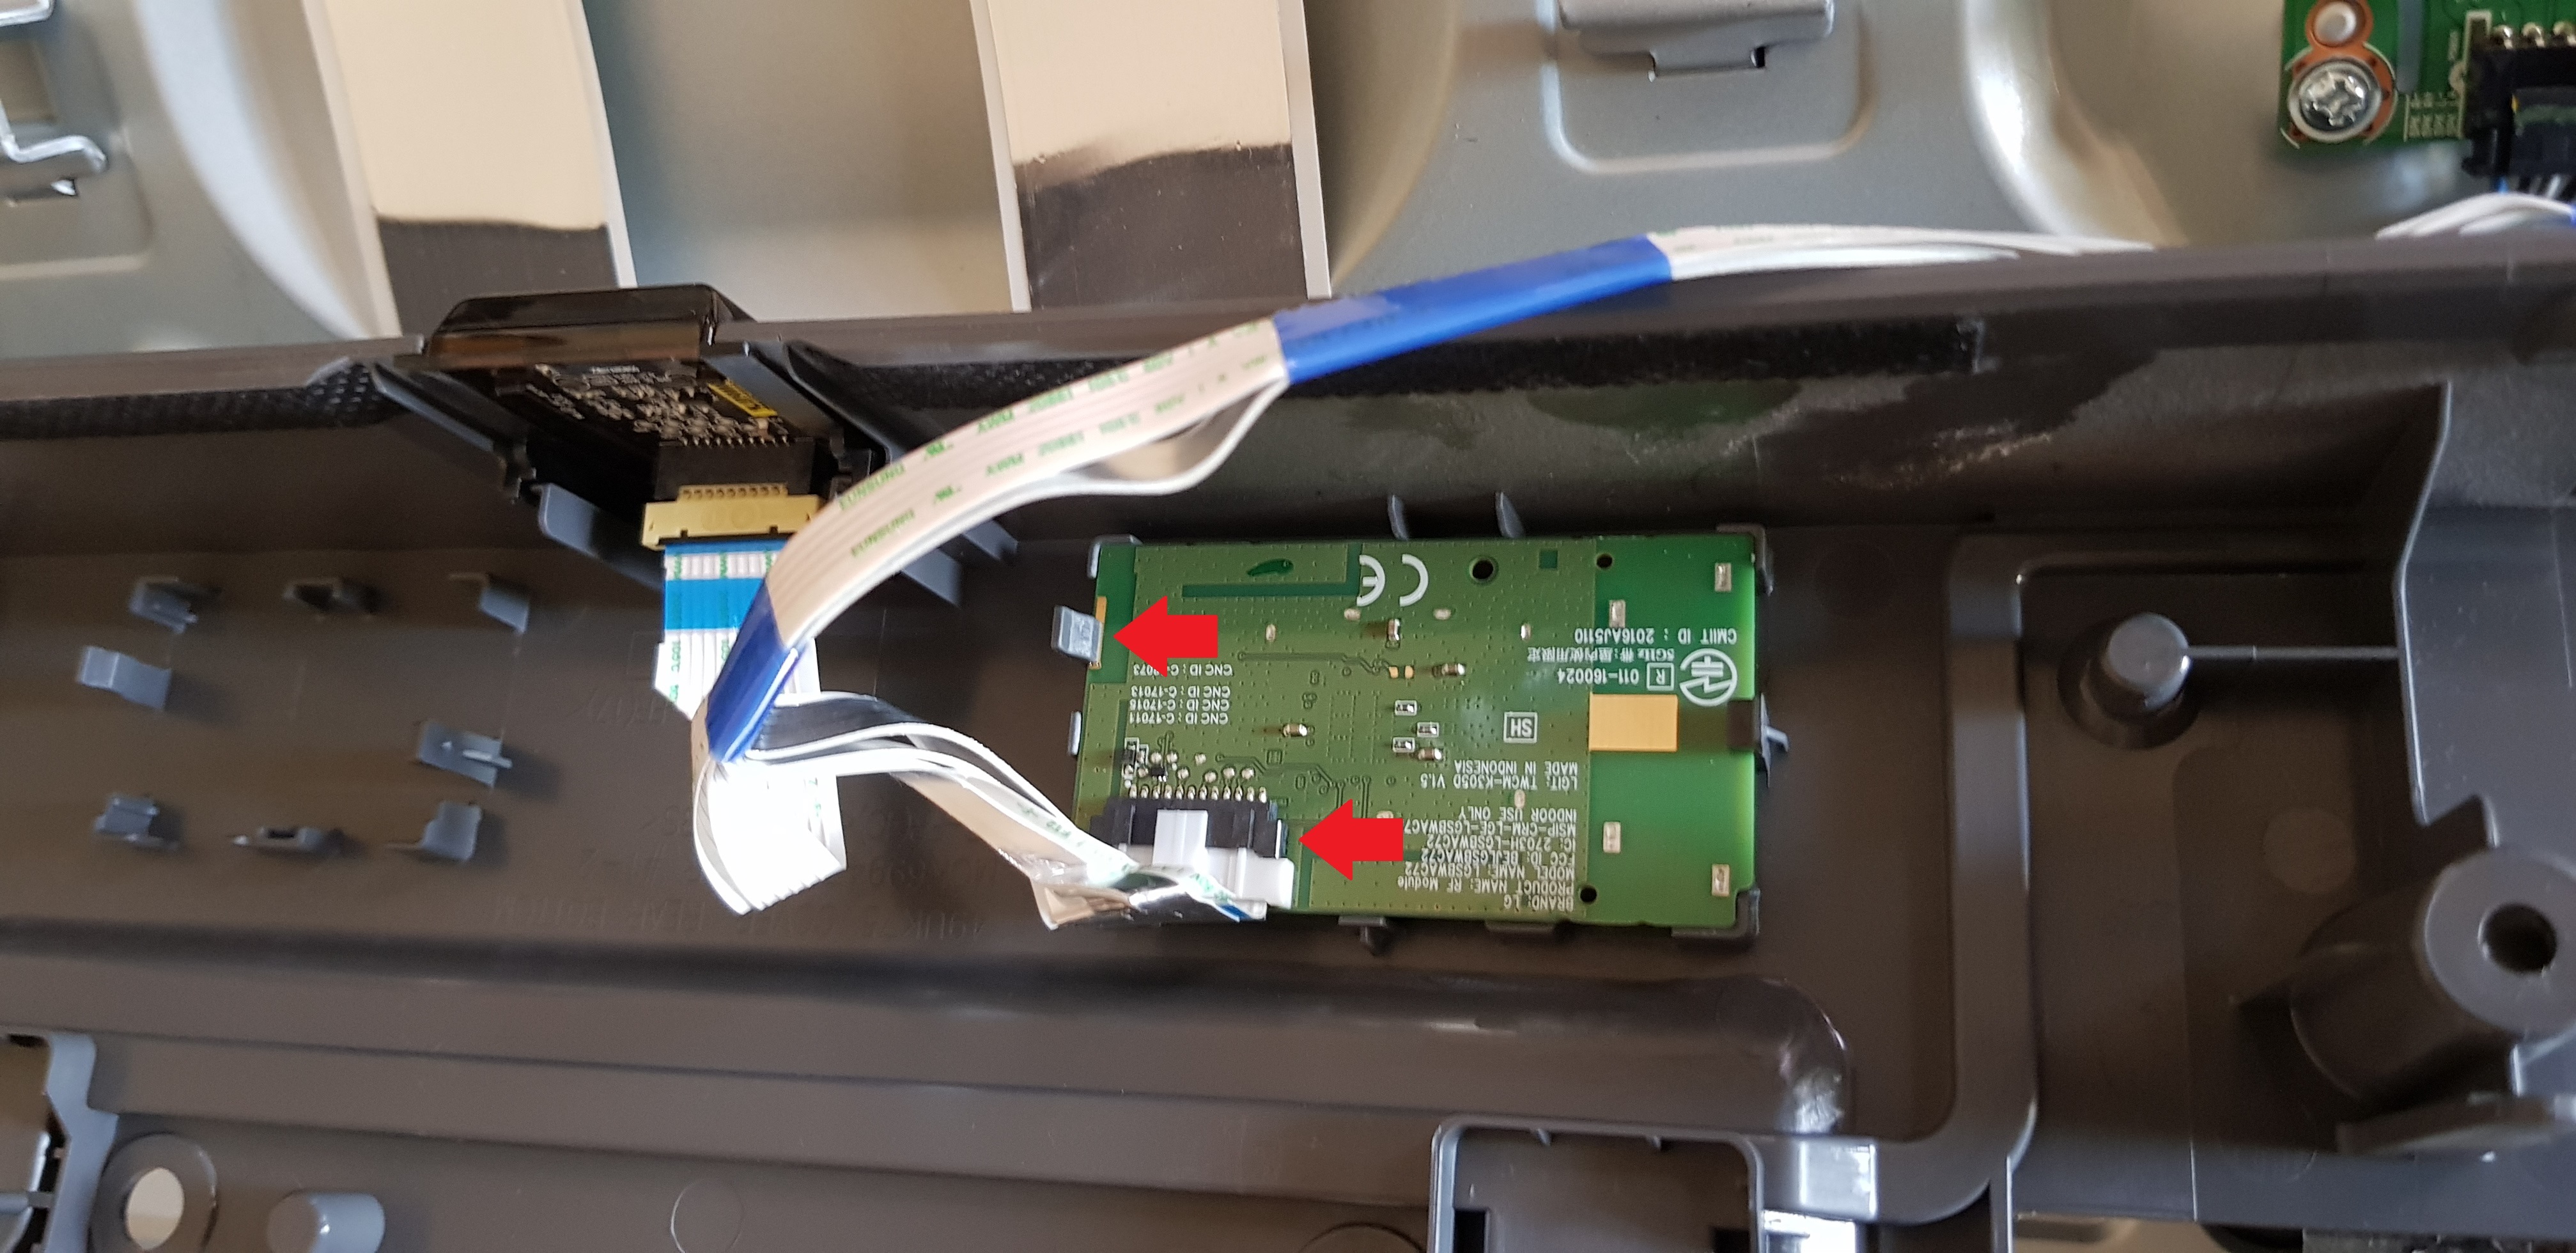
- Tip the plastic shroud over to reveal the WiFi module being careful to move the wiring free of the clips in the shroud. Move the retaining clip shown in the image below away from the board to free the module from the shroud. Unplug the connector from the module by pushing down on the back of the white security clip to lift the other end free of the black socket, then pull the plug free. You may need to gently wiggle the plug end to end.
- Blow gently over the module to ensure there is no dust on it then re-insert the plug and replace the module into the shroud. Leave the wiring free of the clips in the shroud.
- Re-install the shroud and cover on the TV. Screw in the metal threaded screws first, then the self-tapping screws.
- When screwing in the metal thread screws in the bottom of the shroud sleeves, use a small dot of blutack to hold the screw to the screwdriver.
- When screwing in the self tapping screws, start by gently turning the screw counterclockwise until you feel a bump. This will help to align the metal thread of the screw with the previous thread in the hole and reduce the possibility of stripping the thread.
- When replacing the cover, align the top edge first and leave the bottom edge slightly raised to engage the clips across the top edge, then gently press down on the side edges to re-engage the side clips.
- Replace the feet or wall brackets and re-insert all the leads, leaving the power cord until last. Replace the power cord in the wall socket and turn on the power.
Turn the TV on with the remote control. The magic pointer should show almost immediately. Go to:
Settings > Advanced Settings > Network > WiFi
and check that the TV can now find your wifi network.
Though it is not clear exactly why it works, this procedure is primarily based on isolating the WiFi module to completely dissipate any residual power in the module and cleaning the connector by removing and re-inserting it. Note that the WiFi antenna is built onto the module board and has nothing to do with the internal wiring to the module.
Hopefully this tip will work for you.
Return to Tips and Tricks
John's Corner